TCAM2
This model has now been replaced by the Tool Master Basic.
TCAM2 is the entry model for tool measuring with electronic image processing.
It is the intelligent combination of a digital CMOS-camera and evaluation electronics with a 6.4˝ TFT-colour monitor. TCAM2 can be used to align and position profile contours in X- and Z-axis as well as for manual measuring. Mouse operation makes it very easy to use.
The system possesses a high degree of built-in intelligence. Its automatic contour recognition recommends the most suitable measuring method to the operator and automatically displays the measuring lines and coordinates of the tip on the monitor. Tool tip angles and radii are automatically displayed.
An alpha-numerical keypad can be displayed on the screen and used by mouse click. RS-232 interface for program updates and the documentation of measuring results to a computer network. As an option it is possible to transfer machine tool program compatible measuring data to a CNC control via RS-232 interface.
TCAM2 provides the operator with all data required for direct tool presetting, A PC is not required.
|
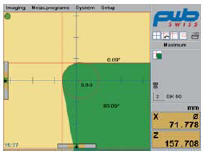
Measuring function with floating reticule
The image processing system will find the edge of the tool locking on to it and giving real time feedback of the tool size without aligning the edge with the main crosshairs. |
|
|
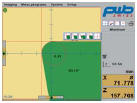
Manual selection of desired measuring process
The TCAM2 system automatically suggests the required measurement mode, this can be manually selected if a different feature is required. |
|
|
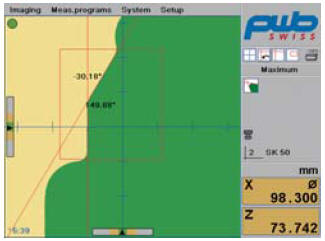
Determination of measuring window
The measurement box can be re-sized and shaped to measure complicated shapes without interference from other features. |
|
|
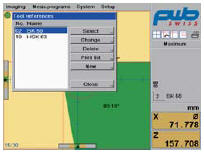
Management of adapter zero points
Up to 99 different adapter offsets can be stored and re-called in the memory, this removes any manual calculation required for different tool shank adaptation. |
|
|
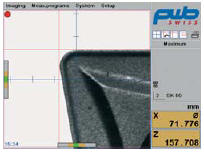
Frontal illumination for tip inspection (optional)
With the addition of frontal illumination, the tool edge can be inspected. In this mode measurements can also be taken via the mouse or cross hairs; the image can also be saved as a Bitmap. |
|
|
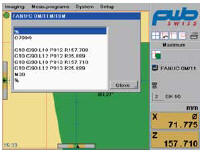
Control compatible data output (optional)
The TCAM2 is capable of linking directly to the machine or DNC without the addition of PC based system. The controller can handle one post processor definition, which can be linked to many machines if they all have the same controller. For multiple controller configurations, see the EPRO system. |
|
Measuring methods
- Fixed and floating axes
- Reticule - centre
Measuring process
- Automatic recognition of measuring process by contour evaluation
- Alternative manual determination of measuring process by mouse click
Measuring functions
- Line/angle/radius
Display and operating features
- Adjusting aid for both axes
- Variable evaluation area, definable by mouse click
- Switchable live image, colour or black/white (tip inspection)
- Display hardcopy via RS-232 for documentation of measuring result
- Glass scales AcuRite 0.001 mm
- Memory for 99 adapter zero points
- Memory for 500 tools, 12 digits, alpha-numerical
- Internal tool library
- Absolute, difference and incremental measurements
- Switchable radius and diameter
- Switchable mm-inch
- Hold function
- Parallelisms and linear compensation
- Password protection
Measurement output
- Label and tool list via USB and RS-232
- Data output for 1 machine tool (optional)
Language selection
- English
- German
- French
- Spanish
- Italian
- Other languages on request
